代码仓库
gitee
创建项目
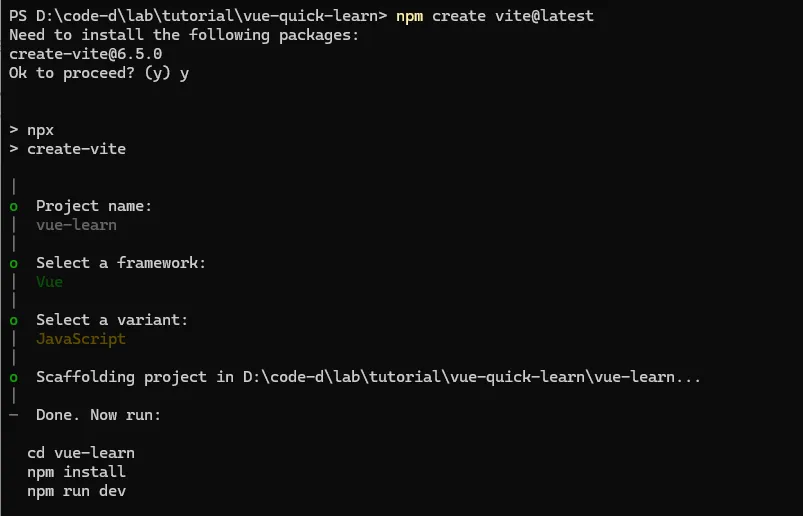
首先保证安装了node, 然后使用vite创建项目
vite
1
2
3
| npm create vite vue-learn
cd vue-learn
npm i
|

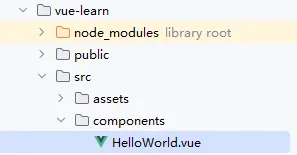
进入项目, 把hello组件删了
然后清空app.vue的内容, 改为
1
2
3
4
|
<template>
    <div>hello world</div>
</template>
|
运行
Option 选项式风格
vue2和vue3两个版本有比较大的变化, 一般来说, vue2用的是选项式风格, vue3用的是组合式风格
data 响应式数据
先看非响应式数据
1
2
3
4
5
6
7
8
9
10
11
12
13
14
15
16
17
18
19
20
21
22
23
24
25
|
<template>
<div>
<div id="counter">count</div>
<button id="btn">+1</button>
</div>
</template>
<script>
export default {
mounted() {
let count = 0;
const counter = document.getElementById("counter");
counter.innerHTML = count
const btn = document.getElementById("btn")
btn.addEventListener("click", () => {
count += 1
console.log(count)
})
}
}
</script>
|
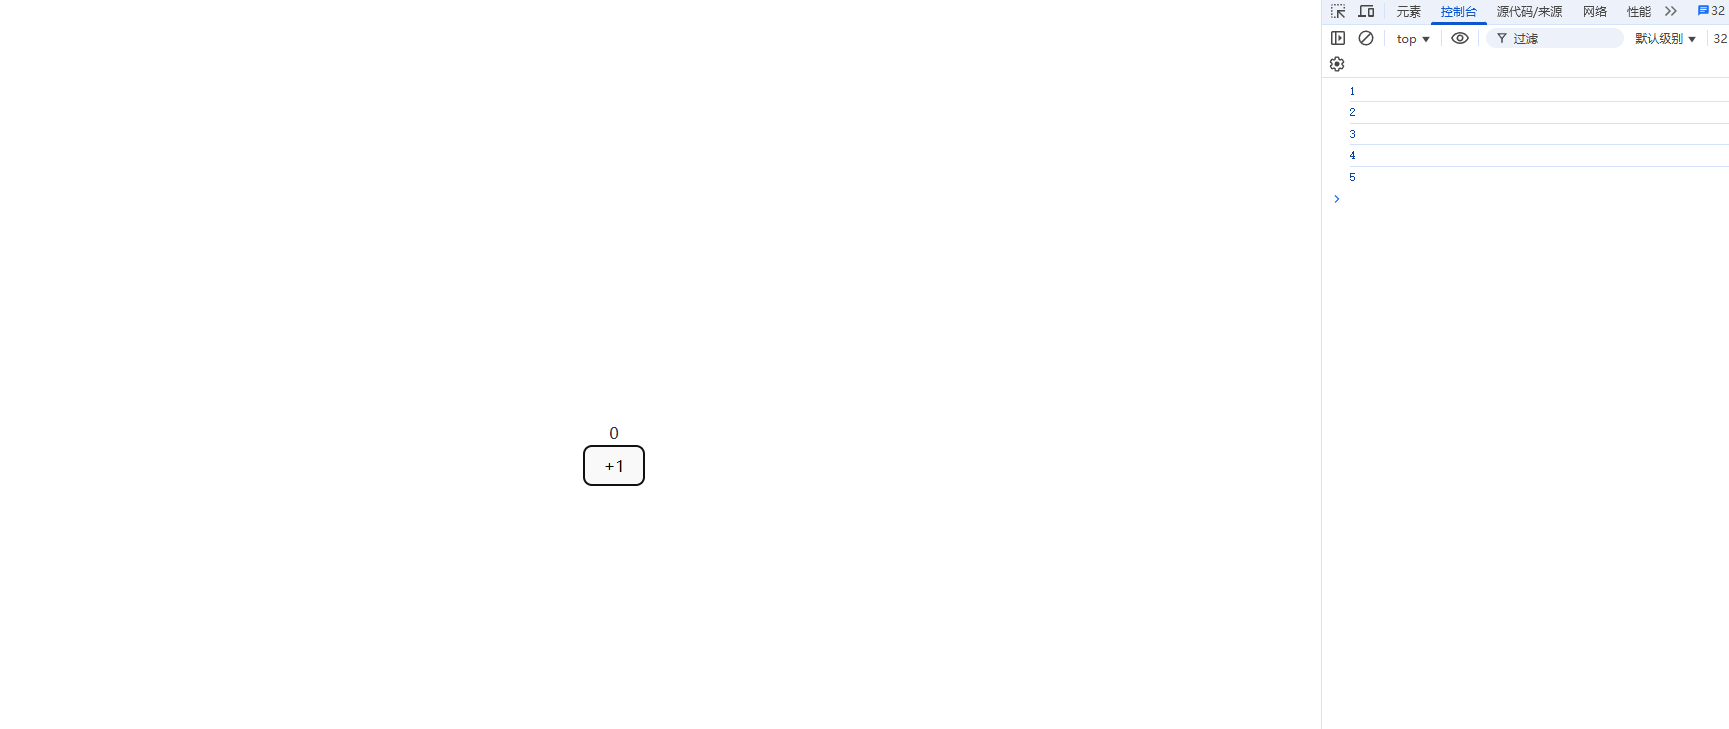
此时, 当你点击按钮, 页面不会变化, 但是可以看到count是在增加的
为了让页面和数据同步变化, 我们需要用到响应式数据, 可以通过data来定义
1
2
3
4
5
6
7
8
9
10
11
12
13
14
15
16
|
<template>
    <div>
        <div id="counter">{{ count }}</div>
        <button id="btn" @click="count += 1">+1</button>
    </div>
</template>
<script>
    export default {
        data() {
            return {
                count: 0
            }
        },
    }
</script>
|
此时再打开页面, 点击按钮, 会发现count的值会同步增加
模板语法
插值
是vue的插值语法, 可以将数据渲染到页面中
1
2
3
4
5
6
7
8
9
10
11
12
13
14
15
|
<template>
    <div>{{ text }}</div>
</template>

<script>
    export default {
        name: "O1_template-grammar",
        data() {
            return {
                text: "插值语法"
            }
        }
    }
</script>
|
指令
内容渲染
v-text v-html
1
2
3
4
5
6
7
8
9
10
11
12
13
14
15
16
17
18
19
|
<template>
    <div>
        <p v-text="textContent"></p>
        <p v-html="htmlContent"></p>
    </div>
</template>

<script>
    export default {
        data() {
            return {
                textContent: "这是v-text渲染的内容",
                htmlContent: "<strong>这是v-html渲染的<strong>HTML</strong>内容</strong>"
            }
        }
    }
</script>
|
属性绑定
v-bind :attrName
1
2
3
4
5
6
7
8
9
10
11
12
13
14
15
16
17
18
19
|
<template>
    <div>
        <img v-bind:src="imageUrl" alt="图片">
        <a :href="linkUrl">点击跳转</a>
    </div>
</template>

<script>
    export default {
        data() {
            return {
                imageUrl: "https://raw.githubusercontent.com/malred/malcode-site-photos/master/img/getqrcode.png",
                linkUrl: "https://malcode-site.github.io/",
            }
        }
    }
</script>
|
事件绑定
v-on @eventName
1
2
3
4
5
6
7
8
9
10
11
12
13
14
15
16
17
18
|
<template>
    <div>
        <button v-on:click="()=>{console.log('v-on')}">点击(v-on)</button>
        <button @click="()=>{console.log('@')}">点击(@简写)</button>
    </div>
</template>

<script>
    export default {
        data() {
            return {
                message: ""
            }
        }
    }
</script>
|
表单双向绑定
v-model
1
2
3
4
5
6
7
8
9
10
11
12
13
14
15
16
17
18
|
<template>
    <div>
        <input type="text" v-model="inputValue">
        <p>输入框的值是:{{ inputValue }}</p>
    </div>
</template>

<script>
    export default {
        data() {
            return {
                inputValue: ""
            }
        }
    }
</script>
|
条件渲染
v-if v-else v-else-if v-show
1
2
3
4
5
6
7
8
9
10
11
12
13
14
15
16
17
18
19
|
<template>
    <div>
        <p v-if="isVisible">内容显示了(v-if)</p>
        <p v-show="isVisible">内容显示了(v-show)</p>
        <button @click="()=>this.isVisible = !this.isVisible">切换可见性</button>
    </div>
</template>

<script>
    export default {
        data() {
            return {
                isVisible: true
            }
        },
    }
</script>
|
列表渲染
v-for
1
2
3
4
5
6
7
8
9
10
11
12
13
14
15
16
17
18
19
20
21
|
<template>
    <div>
        <ul>
            <li v-for="(item, index) in items" :key="index">
                {{ item }}
            </li>
        </ul>
    </div>
</template>

<script>
    export default {
        data() {
            return {
                items: ["苹果", "香蕉", "橙子"]
            }
        }
    }
</script>
|
computed 计算属性
- 说明
computed 是 Vue 提供的用于声明 依赖响应式数据 的计算属性。它会基于其依赖缓存结果,只有当依赖的数据发生变化时才会重新计算。
- 应用场景
- 处理模板中复杂的逻辑表达式(如拼接字符串、过滤、格式化等)。
- 需要根据多个响应式数据派生出新值,且希望避免重复计算。
- 模板中不适合直接写复杂逻辑,可以使用 computed 将处理后的值返回给模板。
案例:根据姓氏和名字拼接全名
1
2
3
4
5
6
7
8
9
10
11
12
13
14
15
16
17
18
19
20
21
22
23
24
25
|
<template>
    <div>
        <input v-model="firstName" placeholder="输入姓">
        <input v-model="lastName" placeholder="输入名">
        <p>全名: {{ fullName }}</p>
    </div>
</template>

<script>
    export default {
        data() {
            return {
                firstName: "",
                lastName: ""
            }
        },
        computed: {
            fullName() {
                return this.firstName + " " + this.lastName;
            }
        }
    }
</script>
|
watch 监听
- 说明
watch 允许你监听某个响应式数据的变化,并在数据变化时执行副作用操作(如异步请求、数据清洗等)。
- 应用场景
- 当数据变化时需要执行异步或开销较大的操作(如调用 API 获取数据)。
- 监听特定字段的变化并做出相应处理。
- 深度监听对象/数组内部值的变化(配合 deep: true)。
- 监听路由变化时更新页面内容。
案例: 搜索框输入时触发 API 请求
1
2
3
4
5
6
7
8
9
10
11
12
13
14
15
16
17
18
19
20
21
22
23
24
25
26
27
|
<template>
<div>
<input v-model="searchQuery" placeholder="输入关键词搜索">
<p>正在搜索: {{ searchQuery }}</p>
</div>
</template>
<script>
export default {
data() {
return {
searchQuery: ""
}
},
watch: {
searchQuery(newVal) {
if (newVal) {
console.log("调用API搜索", newVal);
}
}
}
}
</script>
|
methods 方法
- 说明
methods 用于定义可以在模板中通过事件绑定或者直接调用的方法。这些方法通常用于处理用户交互、数据转换等操作。
- 应用场景
- 绑定按钮点击等事件触发的动作。
- 数据处理、格式化输出等非响应式计算。
- 与用户行为相关的函数调用。
案例: 点击按钮计数并显示次数
1
2
3
4
5
6
7
8
9
10
11
12
13
14
15
16
17
18
19
20
21
22
23
|
<template>
    <div>
        <button @click="increment">+1</button>
        <p>点击次数: {{ count }}</p>
    </div>
</template>

<script>
    export default {
        data() {
            return {
                count: 0
            }
        },
        methods: {
            increment() {
                this.count++;
            }
        }
    }
</script>
|
lifecycle 生命周期
- 说明
Vue 实例从创建到销毁的过程称为生命周期。Vue 提供了多个钩子函数,允许你在不同阶段执行特定逻辑。
- 常见生命周期钩子及应用场景
| 钩子函数 |
触发时机 |
应用场景示例 |
| beforeCreate |
实例初始化之后,数据观测之前 |
很少使用 |
| created |
实例已经创建完成,数据已准备就绪 |
初始化数据、调用接口获取数据 |
| beforeMount |
挂载开始之前 |
几乎不用 |
| mounted |
挂载完成后 |
操作 DOM、第三方库初始化、获取元素尺寸 |
| beforeUpdate |
数据更新前 |
优化性能、记录状态 |
| updated |
数据更新后 |
DOM 更新后的操作 |
| beforeUnmount |
实例销毁前 |
清除定时器、解绑事件 |
| unmounted |
实例销毁后 |
资源释放 |
1
2
3
4
5
6
7
8
9
10
11
12
13
14
15
16
17
18
19
20
21
22
23
24
25
26
27
28
29
30
31
32
33
34
35
36
37
38
39
40
41
42
43
44
45
46
47
48
49
50
51
52
|
<template>
<div>
<h2>生命周期演示组件</h2>
<p>组件加载时间:{{ loadedTime }} 秒</p>
</div>
</template>
<script>
export default {
data() {
return {
loadedTime: 0,
showContent: true,
timer: null
};
},
beforeCreate() {
console.log("🚀 beforeCreate: 实例初始化完成,但数据和方法还未初始化");
},
created() {
console.log("✅ created: 数据已加载,可以开始调用接口或初始化数据");
setTimeout(() => {
console.log("模拟 API 请求完成");
}, 1000);
},
beforeMount() {
console.log("🧭 beforeMount: 模板编译完成,但尚未挂载到 DOM");
},
mounted() {
console.log("🎉 mounted: 组件已渲染到页面,可以操作 DOM 或启动定时器");
this.timer = setInterval(() => {
this.loadedTime += 1;
}, 1000);
},
beforeUpdate() {
console.log("🔄 beforeUpdate: 数据即将更新,DOM 还未更新");
},
updated() {
console.log("✅ updated: 数据和 DOM 已同步更新");
},
beforeUnmount() {
console.log("🛑 beforeUnmount: 组件即将销毁,清理定时器、事件监听等资源");
clearInterval(this.timer);
},
unmounted() {
console.log("👋 unmounted: 组件已销毁,所有绑定解除");
}
};
</script>
|
components 组件
组件传值
父传子
父组件通过 props 向子组件传递数据,是单向数据流。
父组件 Parent.vue
1
2
3
4
5
6
7
8
9
10
11
12
13
14
15
16
17
18
19
20
21
|
<template>
    <div>
        <h2>父组件</h2>
        <Child :message="parentMsg"/>
    </div>
</template>

<script>
    import Child from './Child.vue';

    export default {
        components: {Child},
        data() {
            return {
                parentMsg: '这是来自父组件的消息'
            };
        }
    };
</script>
|
子组件 Child.vue
1
2
3
4
5
6
7
8
9
10
11
12
13
|
<template>
    <div>
        <p>子组件接收到消息:{{ message }}</p>
    </div>
</template>

<script>
    export default {
        props: ['message']
    };
</script>
|
子传父
子组件通过 $emit 触发事件,将数据发送给父组件。
父组件 Parent.vue
1
2
3
4
5
6
7
8
9
10
11
12
13
14
15
16
17
18
19
20
21
22
23
24
25
26
27
|
<template>
    <div>
        <h2>父组件</h2>
        <Child @from-child="handleFromChild"/>
        <p>接收到来自子组件的消息:{{ childMsg }}</p>
    </div>
</template>

<script>
    import Child from './Child.vue';

    export default {
        components: {Child},
        data() {
            return {
                childMsg: ''
            };
        },
        methods: {
            handleFromChild(msg) {
                this.childMsg = msg;
            }
        }
    };
</script>
|
子组件 Child.vue
1
2
3
4
5
6
7
8
9
10
11
12
13
14
15
16
17
|
<template>
    <div>
        <button @click="sendToParent">点击发送给父组件</button>
    </div>
</template>

<script>
    export default {
        methods: {
            sendToParent() {
                this.$emit('from-child', '你好,我是子组件');
            }
        }
    };
</script>
|
兄弟传值
通过一个公共的“事件总线”或 Vuex 状态管理实现非父子组件之间的通信。
创建 event-bus.js (vue2才支持这种写法, vue3的话我在参考代码里实现了简易的方案)
1
2
3
4
5
|
import Vue from 'vue';
export const EventBus = new Vue();
|
兄弟组件 A - Sender.vue
1
2
3
4
5
6
7
8
9
10
11
12
13
14
15
16
17
18
19
|
<template>
    <div>
        <button @click="sendMessage">发送消息给兄弟组件</button>
    </div>
</template>

<script>
    import {EventBus} from '../event-bus.js';

    export default {
        methods: {
            sendMessage() {
                EventBus.$emit('brother-msg', '来自组件A的消息');
            }
        }
    };
</script>
|
兄弟组件 B - Receiver.vue
1
2
3
4
5
6
7
8
9
10
11
12
13
14
15
16
17
18
19
20
21
22
23
24
25
26
27
|
<template>
    <div>
        <p>接收到兄弟组件的消息:{{ msg }}</p>
    </div>
</template>

<script>
    import {EventBus} from '../event-bus.js';

    export default {
        data() {
            return {
                msg: ''
            };
        },
        mounted() {
            EventBus.$on('brother-msg', (msg) => {
                this.msg = msg;
            });
        },
        beforeUnmount() {
            EventBus.$off('brother-msg');
        }
    };
</script>
|
跨级传值
祖先组件通过 provide 提供数据,后代组件通过 inject 接收,无需逐层传递。
祖先组件 GrandParent.vue
1
2
3
4
5
6
7
8
9
10
11
12
13
14
15
16
17
18
19
20
21
22
|
<template>
    <div>
        <h2>祖组件</h2>
        <Parent/>
    </div>
</template>

<script>
    import Parent from './Parent.vue';

    export default {
        components: {Parent},
        provide() {
            return {
                theme: 'dark',
                appName: 'MyApp'
            };
        }
    };
</script>
|
中间组件 Parent.vue
1
2
3
4
5
6
7
8
9
10
11
12
13
14
15
16
|
<template>
    <div>
        <h3>中间组件</h3>
        <Child/>
    </div>
</template>

<script>
    import Child from './Child.vue';

    export default {
        components: {Child}
    };
</script>
|
子组件 Child.vue
1
2
3
4
5
6
7
8
9
10
11
12
13
14
|
<template>
    <div>
        <p>从祖组件注入的主题:{{ theme }}</p>
        <p>应用名称:{{ appName }}</p>
    </div>
</template>

<script>
    export default {
        inject: ['theme', 'appName']
    };
</script>
|
Composition 组合式风格
Vue 3 引入了 组合式 API(Composition API),它提供了一种更灵活、更可复用的方式来组织逻辑代码,特别适合大型项目和逻辑复用场景。
🧩 基本概念
- 与 Vue 2 的 Option API 不同,Composition API 更偏向函数式编程。
- 使用 setup() 函数替代 data、methods、created 等选项。
- 可以使用 ref、reactive、computed、watch 等函数来管理响应式数据。
- 支持自定义逻辑封装(即 Custom Hooks)。
📦 setup() 函数
1
2
3
4
5
6
7
8
9
10
11
12
13
14
15
16
17
|
<script>
    import {ref} from 'vue';

    export default {
        setup() {
            const count = ref(0);

            function increment() {
                count.value++;
            }

            return {count, increment};
        }
    }
</script>
|
vue3还提供了setup语法糖(Syntactic Sugar),用于更简洁地使用 组合式 API(Composition
API)。它极大地简化了组件的定义方式,让开发者可以更直观、更高效地编写响应式逻辑。
在这个模式下,你无需显式导出 setup() 函数或返回模板中使用的变量。
所有在 setup 中声明的变量和函数都可以直接在template 中使用。
1
2
3
4
5
6
7
8
|
<script setup>
    const count = ref(0);

    function increment() {
        count.value++;
    }
</script>
|
🔁 ref 和 reactive
类型|用途说明|
ref|创建基本类型响应式数据(如 number、string)|
reactive|创建对象或数组的响应式引用|
1
2
| const count = ref(0);
const user = reactive({name: '张三', age: 25});
|
🧠 computed 计算属性
1
2
3
| import {computed} from 'vue';
const fullName = computed(() => firstName.value + ' ' + lastName.value);
|
👀 watch 监听器
1
2
3
4
5
6
| import {watch} from 'vue';
watch(count, (newVal, oldVal) => {
console.log('count changed:', newVal);
});
|
⏱ 生命周期钩子
Vue 3 的组合式 API 提供了对应的生命周期钩子函数:
| 选项式钩子 |
组合式写法 |
| beforeCreate |
❌ 不再需要 |
| created |
❌ 不再需要 |
| beforeMount |
onBeforeMount |
| mounted |
onMounted |
| beforeUpdate |
onBeforeUpdate |
| updated |
onUpdated |
| beforeUnmount |
onBeforeUnmount |
| unmounted |
onUnmounted |
1
2
3
4
5
6
| import {onMounted} from 'vue';
onMounted(() => {
console.log('组件挂载完成');
});
|
组件传值
这个部分可以使用pinia/vuex等状态管理库来实现, 了解即可
🧱 一、父组件 → 子组件(props)
使用 defineProps 接收父组件传递的数据。
父组件 Parent.vue
1
2
3
4
5
6
7
8
9
10
11
12
13
14
15
|
<template>
    <div>
        <h2>父组件</h2>
        <Child :message="parentMsg"/>
    </div>
</template>

<script setup>
    import {ref} from 'vue';
    import Child from './Child.vue';

    const parentMsg = ref('这是来自父组件的消息');
</script>
|
子组件 Child.vue
1
2
3
4
5
6
7
8
9
10
11
12
|
<template>
<div>
<p>子组件接收到消息:{{ message }}</p>
</div>
</template>
<script setup>
const props = defineProps(['message']);
</script>
|
🔁 二、子组件 → 父组件(emit / defineEmits)
使用 defineEmits 触发事件通知父组件。
父组件 Parent.vue
1
2
3
4
5
6
7
8
9
10
11
12
13
14
15
16
17
18
19
20
|
<template>
    <div>
        <h2>父组件</h2>
        <Child @from-child="handleFromChild"/>
        <p>接收到来自子组件的消息:{{ childMsg }}</p>
    </div>
</template>

<script setup>
    import {ref} from 'vue';
    import Child from './Child.vue';

    const childMsg = ref('');

    function handleFromChild(msg) {
        childMsg.value = msg;
    }
</script>
|
子组件 Child.vue
1
2
3
4
5
6
7
8
9
10
11
12
13
14
15
16
|
<template>
<div>
<button @click="sendToParent">点击发送给父组件</button>
</div>
</template>
<script setup>
const emit = defineEmits(['from-child']);
function sendToParent() {
emit('from-child', '你好,我是子组件');
}
</script>
|
👯♂️ 三、兄弟组件传值(EventBus / mitt)
vue3不支持vue2的eventbus, 可以通过共同的父组件来传递数据。
🌳 四、跨级传值(provide / inject)
使用 provide 向深层组件注入数据,inject 接收。
祖先组件 GrandParent.vue
1
2
3
4
5
6
7
8
9
10
11
12
13
14
15
16
17
|
<template>
<div>
<h2>祖组件</h2>
<Parent/>
</div>
</template>
<script setup>
import {provide} from 'vue';
import Parent from './Parent.vue';
provide('theme', 'dark');
provide('appName', 'MyApp');
</script>
|
中间组件 Parent.vue
1
2
3
4
5
6
7
8
9
10
11
12
|
<template>
    <div>
        <h3>中间组件</h3>
        <Child/>
    </div>
</template>

<script setup>
    import Child from './Child.vue';
</script>
|
子组件 Child.vue
1
2
3
4
5
6
7
8
9
10
11
12
13
14
15
16
|
<template>
<div>
<p>从祖组件注入的主题:{{ theme }}</p>
<p>应用名称:{{ appName }}</p>
</div>
</template>
<script setup>
import {inject} from 'vue';
const theme = inject('theme');
const appName = inject('appName');
</script>
|
社群
你可以在这些平台联系我: