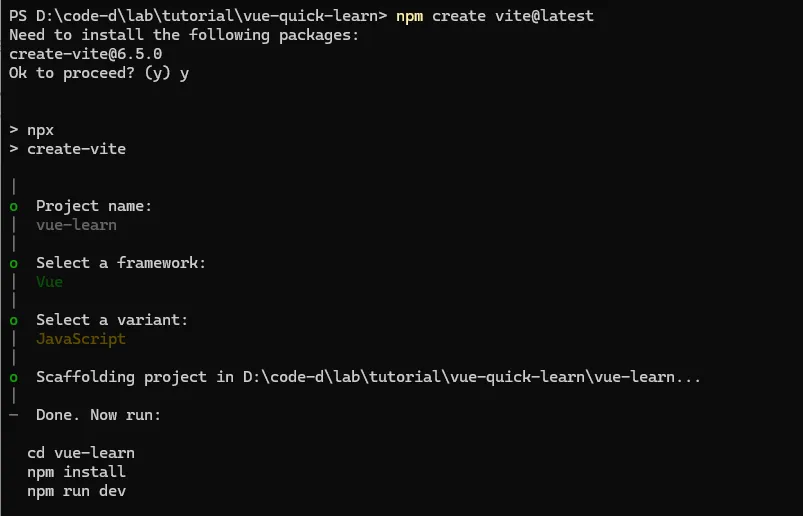
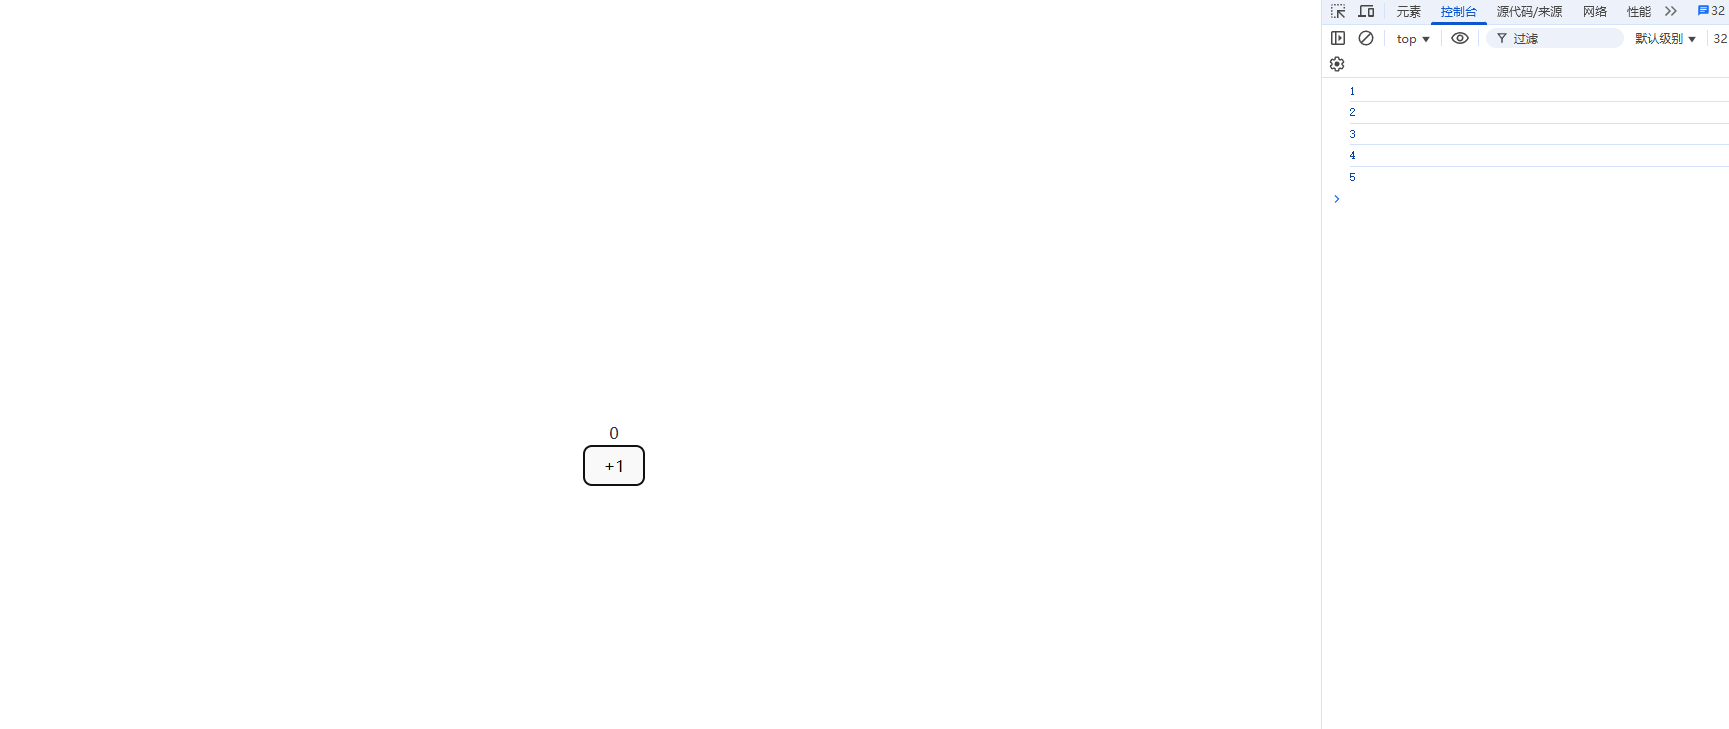
Code Repository

gitee

Creating a Project

First, ensure you have Node.js installed, then use Vite to create a project.
vite

1
2
3
npm create vite vue-learn
cd vue-learn
npm i


Enter the project and delete the hello component.

Then, clear the content of app.vue and modify it to:

1
2
3
4

<template>
<div>hello world</div>
</template>

Run the project:

1
npm run dev

Option API (Options Style)

Vue 2 and Vue 3 have significant changes. Generally, Vue 2 uses the Options API, while Vue 3 uses the Composition API.

data Reactive Data

First, let’s look at non-reactive data.

1
2
3
4
5
6
7
8
9
10
11
12
13
14
15
16
17
18
19
20
21
22
23
24
25

<template>
<div>
<div id="counter">count</div>
<button id="btn">+1</button>
</div>
</template>
<script>
export default {
// This is a lifecycle function; we'll ignore it for now because it allows access to DOM elements in mounted
mounted() {
// Non-reactive data
let count = 0;
// Render count
const counter = document.getElementById("counter");
counter.innerHTML = count;
// Method to change count; note if the page updates after the change
const btn = document.getElementById("btn");
btn.addEventListener("click", () => {
count += 1;
console.log(count);
});
}
}
</script>

At this point, when you click the button, the page does not change, but you can see that the count is increasing.

To synchronize the page and data changes, we need to use reactive data, which can be defined using data.

1
2
3
4
5
6
7
8
9
10
11
12
13
14
15
16

<template>
<div>
<div id="counter">{{ count }}</div>
<button id="btn" @click="count += 1">+1</button>
</div>
</template>
<script>
export default {
data() {
return {
count: 0
};
},
}
</script>

Now, when you open the page and click the button, you will see that the value of count increases synchronously.

Template Syntax

Interpolation

1
{{}}

is Vue’s interpolation syntax, which can render data onto the page.

1
2
3
4
5
6
7
8
9
10
11
12
13
14

<template>
<div>{{ text }}</div>
</template>
<script>
export default {
name: "O1_template-grammar",
data() {
return {
text: "Interpolation syntax"
};
}
}
</script>

Directives

Content Rendering

v-text v-html

1
2
3
4
5
6
7
8
9
10
11
12
13
14
15
16
17

<template>
<div>
<p v-text="textContent"></p>
<p v-html="htmlContent"></p>
</div>
</template>
<script>
export default {
data() {
return {
textContent: "This is content rendered by v-text",
htmlContent: "<strong>This is HTML content rendered by <strong>HTML</strong></strong>"
};
}
}
</script>

Attribute Binding

v-bind :attrName

1
2
3
4
5
6
7
8
9
10
11
12
13
14
15
16
17

<template>
<div>
<img v-bind:src="imageUrl" alt="Image">
<a :href="linkUrl">Click to jump</a>
</div>
</template>
<script>
export default {
data() {
return {
imageUrl: "https://raw.githubusercontent.com/malred/malcode-site-photos/master/img/getqrcode.png",
linkUrl: "https://malcode-site.github.io/",
};
}
}
</script>

Event Binding

v-on @eventName

1
2
3
4
5
6
7
8
9
10
11
12
13
14
15
16

<template>
<div>
<button v-on:click="() => {console.log('v-on')}">Click (v-on)</button>
<button @click="() => {console.log('@')}">Click (@ shorthand)</button>
</div>
</template>
<script>
export default {
data() {
return {
message: ""
};
}
}
</script>

Two-way Form Binding

v-model

1
2
3
4
5
6
7
8
9
10
11
12
13
14
15
16

<template>
<div>
<input type="text" v-model="inputValue">
<p>The value of the input is: {{ inputValue }}</p>
</div>
</template>
<script>
export default {
data() {
return {
inputValue: ""
};
}
}
</script>

Conditional Rendering

v-if v-else v-else-if v-show

1
2
3
4
5
6
7
8
9
10
11
12
13
14
15
16
17

<template>
<div>
<p v-if="isVisible">Content is displayed (v-if)</p>
<p v-show="isVisible">Content is displayed (v-show)</p>
<button @click="() => this.isVisible = !this.isVisible">Toggle visibility</button>
</div>
</template>
<script>
export default {
data() {
return {
isVisible: true
};
},
}
</script>

List Rendering

v-for

1
2
3
4
5
6
7
8
9
10
11
12
13
14
15
16
17
18
19

<template>
<div>
<ul>
<li v-for="(item, index) in items" :key="index">
{{ item }}
</li>
</ul>
</div>
</template>
<script>
export default {
data() {
return {
items: ["Apple", "Banana", "Orange"]
};
}
}
</script>

computed Computed Properties

  • Description
    computed is a feature provided by Vue for declaring computed properties that depend on reactive data. It caches the
    result based on its dependencies and only recalculates when the dependent data changes.
  • Use Cases
    • Handling complex logical expressions in templates (e.g., string concatenation, filtering, formatting, etc.).
    • Deriving new values from multiple reactive data and avoiding redundant calculations.
    • When complex logic is not suitable to be written directly in templates, computed can be used to return processed
      values to templates.
      Example: Concatenate first name and last name to form a full name.
1
2
3
4
5
6
7
8
9
10
11
12
13
14
15
16
17
18
19
20
21
22
23

<template>
<div>
<input v-model="firstName" placeholder="Enter first name">
<input v-model="lastName" placeholder="Enter last name">
<p>Full name: {{ fullName }}</p>
</div>
</template>
<script>
export default {
data() {
return {
firstName: "",
lastName: ""
};
},
computed: {
fullName() {
return this.firstName + " " + this.lastName;
}
}
}
</script>

watch Watcher

  • Description
    watch allows you to listen for changes in reactive data and execute side effects (e.g., asynchronous requests, data
    cleaning, etc.) when the data changes.
  • Use Cases
    • Executing asynchronous or expensive operations when data changes (e.g., calling APIs to fetch data).
    • Listening for changes in specific fields and making corresponding actions.
    • Deeply watching changes in object/array internal values (with deep: true).
    • Listening for route changes to update page content.
      Example: Trigger an API request when searching in the input box.
1
2
3
4
5
6
7
8
9
10
11
12
13
14
15
16
17
18
19
20
21
22
23
24
25

<template>
<div>
<input v-model="searchQuery" placeholder="Enter keywords to search">
<p>Searching: {{ searchQuery }}</p>
</div>
</template>
<script>
export default {
data() {
return {
searchQuery: ""
};
},
watch: {
searchQuery(newVal) {
if (newVal) {
console.log("Calling API to search", newVal);
// This can be replaced with a real request
// fetch(`/api/search?q=${newVal}`)
}
}
}
}
</script>

methods Methods

  • Description
    methods are used to define functions that can be called in templates through event binding or directly. These methods
    are typically used for handling user interactions, data transformations, etc.
  • Use Cases
    • Binding actions triggered by button clicks and other events.
    • Data processing, formatting output, etc., for non-reactive calculations.
    • Function calls related to user behavior.
      Example: Click the button to count and display the number of clicks.
1
2
3
4
5
6
7
8
9
10
11
12
13
14
15
16
17
18
19
20
21

<template>
<div>
<button @click="increment">+1</button>
<p>Number of clicks: {{ count }}</p>
</div>
</template>
<script>
export default {
data() {
return {
count: 0
};
},
methods: {
increment() {
this.count++;
}
}
}
</script>

lifecycle Lifecycle

  • Description
    The process from the creation to destruction of a Vue instance is called the lifecycle. Vue provides several hook
    functions that allow you to execute specific logic at different stages.
  • Common Lifecycle Hooks and Use Cases
    Hook Function Trigger Time Example Use Case
    beforeCreate After instance initialization, before data observation Rarely used
    created After instance creation is complete, data is ready Initialize data, call interfaces to fetch data
    beforeMount Before mounting begins Almost unused
    mounted After mounting is complete Manipulate DOM, initialize third-party libraries, get element dimensions
    beforeUpdate Before data updates Optimize performance, record state
    updated After data updates Operations after DOM updates
    beforeUnmount Before instance destruction Clear timers, unbind events
    unmounted After instance destruction Release resources
1
2
3
4
5
6
7
8
9
10
11
12
13
14
15
16
17
18
19
20
21
22
23
24
25
26
27
28
29
30
31
32
33
34
35
36
37
38
39
40
41
42
43
44
45
46
47
48
49
50

<template>
<div>
<h2>Component Lifecycle Demo</h2>
<p>Component load time: {{ loadedTime }} seconds</p>
</div>
</template>
<script>
export default {
data() {
return {
loadedTime: 0,
showContent: true,
timer: null
};
},
beforeCreate() {
console.log("🚀 beforeCreate: Instance initialization is complete, but data and methods are not yet initialized");
},
created() {
console.log("✅ created: Data is loaded, you can start calling interfaces or initializing data");
// Simulate an asynchronous request
setTimeout(() => {
console.log("Simulated API request completed");
}, 1000);
},
beforeMount() {
console.log("🧭 beforeMount: Template compilation is complete, but not yet mounted to the DOM");
},
mounted() {
console.log("🎉 mounted: Component has been rendered to the page, you can manipulate DOM or start timers");
this.timer = setInterval(() => {
this.loadedTime += 1;
}, 1000);
},
beforeUpdate() {
console.log("🔄 beforeUpdate: Data is about to update, DOM has not yet updated");
},
updated() {
console.log("✅ updated: Data and DOM have been synchronized");
},
beforeUnmount() {
console.log("🛑 beforeUnmount: Component is about to be destroyed, clean up timers, event listeners, etc.");
clearInterval(this.timer);
},
unmounted() {
console.log("👋 unmounted: Component has been destroyed, all bindings have been removed");
}
};
</script>

components Components

Component Data Passing

Parent to Child

Parent components pass data to child components via props, which is a one-way data flow.
Parent Component Parent.vue

1
2
3
4
5
6
7
8
9
10
11
12
13
14
15
16
17
18
19

<template>
<div>
<h2>Parent Component</h2>
<Child :message="parentMsg"/>
</div>
</template>
<script>
import Child from './Child.vue';

export default {
components: {Child},
data() {
return {
parentMsg: 'This is a message from the parent component'
};
}
};
</script>

Child Component Child.vue

1
2
3
4
5
6
7
8
9
10
11

<template>
<div>
<p>Message received by child component: {{ message }}</p>
</div>
</template>
<script>
export default {
props: ['message']
};
</script>

Child to Parent

Child components trigger events via $emit and send data to parent components.
Parent Component Parent.vue

1
2
3
4
5
6
7
8
9
10
11
12
13
14
15
16
17
18
19
20
21
22
23
24
25

<template>
<div>
<h2>Parent Component</h2>
<Child @from-child="handleFromChild"/>
<p>Message received from child component: {{ childMsg }}</p>
</div>
</template>
<script>
import Child from './Child.vue';

export default {
components: {Child},
data() {
return {
childMsg: ''
};
},
methods: {
handleFromChild(msg) {
this.childMsg = msg;
}
}
};
</script>

Child Component Child.vue

1
2
3
4
5
6
7
8
9
10
11
12
13
14
15

<template>
<div>
<button @click="sendToParent">Click to send to parent component</button>
</div>
</template>
<script>
export default {
methods: {
sendToParent() {
this.$emit('from-child', 'Hello, I am the child component');
}
}
};
</script>

Sibling Components

Pass data between non-parent-child components through a common “event bus” or Vuex state management.
Create event-bus.js (This syntax is supported in Vue 2; for Vue 3, I implemented a simple solution in the reference
code)

1
2
3
4
// event-bus.js
import Vue from 'vue';

export const EventBus = new Vue();

Sibling Component A - Sender.vue

1
2
3
4
5
6
7
8
9
10
11
12
13
14
15
16
17

<template>
<div>
<button @click="sendMessage">Send message to sibling component</button>
</div>
</template>
<script>
import {EventBus} from '../event-bus.js';

export default {
methods: {
sendMessage() {
EventBus.$emit('brother-msg', 'Message from component A');
}
}
};
</script>

Sibling Component B - Receiver.vue

1
2
3
4
5
6
7
8
9
10
11
12
13
14
15
16
17
18
19
20
21
22
23
24
25

<template>
<div>
<p>Message received from sibling component: {{ msg }}</p>
</div>
</template>
<script>
import {EventBus} from '../event-bus.js';

export default {
data() {
return {
msg: ''
};
},
mounted() {
EventBus.$on('brother-msg', (msg) => {
this.msg = msg;
});
},
beforeUnmount() {
EventBus.$off('brother-msg');
}
};
</script>

Cross-Level Data Passing

Ancestor components provide data via provide, and descendant components receive it via inject, without passing through
each level.
Ancestor Component GrandParent.vue

1
2
3
4
5
6
7
8
9
10
11
12
13
14
15
16
17
18
19
20

<template>
<div>
<h2>Grandparent Component</h2>
<Parent/>
</div>
</template>
<script>
import Parent from './Parent.vue';

export default {
components: {Parent},
provide() {
return {
theme: 'dark',
appName: 'MyApp'
};
}
};
</script>

Intermediate Component Parent.vue

1
2
3
4
5
6
7
8
9
10
11
12
13
14

<template>
<div>
<h3>Intermediate Component</h3>
<Child/>
</div>
</template>
<script>
import Child from './Child.vue';

export default {
components: {Child}
};
</script>

Child Component Child.vue

1
2
3
4
5
6
7
8
9
10
11
12

<template>
<div>
<p>Theme injected from grandparent component: {{ theme }}</p>
<p>Application name: {{ appName }}</p>
</div>
</template>
<script>
export default {
inject: ['theme', 'appName']
};
</script>

Composition Composition API

Vue 3 introduced the Composition API, which provides a more flexible and reusable way to organize logic code, especially
suitable for large projects and logic reuse scenarios.

Basic Concepts

  • Unlike Vue 2’s Options API, the Composition API is more function-oriented.
  • Uses the setup() function instead of data, methods, created, etc.
  • Can use ref, reactive, computed, watch, etc., to manage reactive data.
  • Supports custom logic encapsulation (i.e., Custom Hooks).

setup() Function

1
2
3
4
5
6
7
8
9
10
11
12
13
14
15
16

<script>
import {ref} from 'vue';

export default {
setup() {
const count = ref(0);

function increment() {
count.value++;
}

return {count, increment};
}
}
</script>

Vue 3 also provides setup syntax sugar (Syntactic Sugar) for a more concise use of the Composition API. It greatly
simplifies the way components are defined, allowing developers to write reactive logic more intuitively and efficiently.
In this mode, you do not need to explicitly export the setup() function or return variables used in the template. All
variables and functions declared in setup can be used directly in the template.

1
2
3
4
5
6
7
8

<script setup>
const count = ref(0);

function increment() {
count.value++;
}
</script>

ref and reactive

Type Usage Description
ref Creates reactive data for primitive types (e.g., number, string)
reactive Creates reactive references for objects or arrays
1
2
const count = ref(0);
const user = reactive({name: 'Zhang San', age: 25});

computed Computed Properties

1
2
3
import {computed} from 'vue';

const fullName = computed(() => firstName.value + ' ' + lastName.value);

watch Watcher

1
2
3
4
5
import {watch} from 'vue';

watch(count, (newVal, oldVal) => {
console.log('count changed:', newVal);
});

Lifecycle Hooks

Vue 3’s Composition API provides corresponding lifecycle hook functions:

Options API Hook Composition API Syntax
beforeCreate ❌ Not needed
created ❌ Not needed
beforeMount onBeforeMount
mounted onMounted
beforeUpdate onBeforeUpdate
updated onUpdated
beforeUnmount onBeforeUnmount
unmounted onUnmounted
1
2
3
4
5
import {onMounted} from 'vue';

onMounted(() => {
console.log('Component mounted complete');
});

Component Data Passing

This section can be implemented using state management libraries like Pinia/Vuex, etc. Understanding is sufficient.

Parent to Child (props)

Use defineProps to receive data passed from the parent component.
Parent Component Parent.vue

1
2
3
4
5
6
7
8
9
10
11
12
13

<template>
<div>
<h2>Parent Component</h2>
<Child :message="parentMsg"/>
</div>
</template>
<script setup>
import {ref} from 'vue';
import Child from './Child.vue';

const parentMsg = ref('This is a message from the parent component');
</script>

Child Component Child.vue

1
2
3
4
5
6
7
8
9
10

<template>
<div>
<p>Child component received message: {{ message }}</p>
</div>
</template>
<script setup>
// Define props
const props = defineProps(['message']);
</script>

Child to Parent (emit / defineEmits)

Use defineEmits to trigger events and notify the parent component.
Parent Component Parent.vue

1
2
3
4
5
6
7
8
9
10
11
12
13
14
15
16
17
18

<template>
<div>
<h2>Parent Component</h2>
<Child @from-child="handleFromChild"/>
<p>Message received from child component: {{ childMsg }}</p>
</div>
</template>
<script setup>
import {ref} from 'vue';
import Child from './Child.vue';

const childMsg = ref('');

function handleFromChild(msg) {
childMsg.value = msg;
}
</script>

Child Component Child.vue

1
2
3
4
5
6
7
8
9
10
11
12
13
14

<template>
<div>
<button @click="sendToParent">Click to send to parent component</button>
</div>
</template>
<script setup>
// Define emit events
const emit = defineEmits(['from-child']);

function sendToParent() {
emit('from-child', 'Hello, I am the child component');
}
</script>

Sibling Component Data Passing (EventBus / mitt)

Vue 3 does not support Vue 2’s event bus, so data can be passed through a common parent component.

Cross-Level Data Passing (provide / inject)

Use provide to inject data into deep components and inject to receive.
Ancestor Component GrandParent.vue

1
2
3
4
5
6
7
8
9
10
11
12
13
14

<template>
<div>
<h2>Grandparent Component</h2>
<Parent/>
</div>
</template>
<script setup>
import {provide} from 'vue';
import Parent from './Parent.vue';
// Provide data
provide('theme', 'dark');
provide('appName', 'MyApp');
</script>

Intermediate Component Parent.vue

1
2
3
4
5
6
7
8
9
10

<template>
<div>
<h3>Intermediate Component</h3>
<Child/>
</div>
</template>
<script setup>
import Child from './Child.vue';
</script>

Child Component Child.vue

1
2
3
4
5
6
7
8
9
10
11
12
13

<template>
<div>
<p>Theme injected from grandparent component: {{ theme }}</p>
<p>Application name: {{ appName }}</p>
</div>
</template>
<script setup>
import {inject} from 'vue';
// Inject data
const theme = inject('theme');
const appName = inject('appName');
</script>

Community

You can contact me on these platforms:


本站总访问量